Thursday 25 June 2015

Next steps after first Training Day...

Yesterday, we held the first R for Biochemists Training Day organised through the Biochemical Society. There were great questions, diligent students and three inspiring tutors.
Dr Sergio Martinez Cuesta, Dr Tim Stone and Dr Dean Hammond

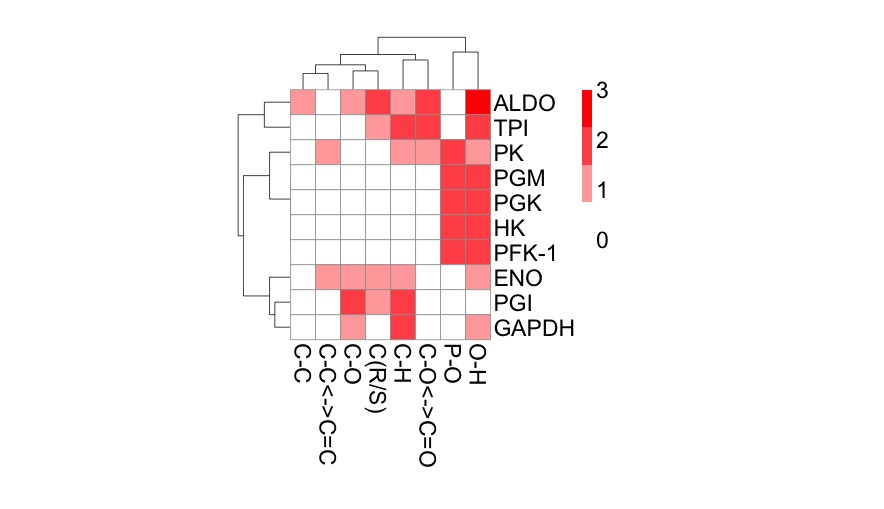
I learned about principal component analysis, microarray analysis and getting data into R can be quite challenging. I also learned that you can import pictures files into R. I'll write more about that in the future.
I hope the attendees enjoyed it and learned something. They generally seemed happy with the day but I will have to await the formal feedback.

For those that attended and others, here are a few resources that might help you to keep learning:

However, the most important things to be are diligent (spend a little time each day playing with R) and patient (things take time to learn and longer to master). 

Wednesday 24 June 2015

Microarray files and script...

Please try to download the data from here:
http://science2therapy.com/data/RAWdata.txt.zip

and here:
http://science2therapy.com/data/REDUCEDdata.txt.zip

Here is the script:

# Readme: note 1 - packages
# please refer to the accompanying Word document

#source("http://bioconductor.org/biocLite.R")
#biocLite("oligo")
#biocLite("genefilter")

# Now to "switch on" the oligo and genefilter packages, using the library command
library(oligo)
library(genefilter)

# Readme: note 2 - parameters
par(ask=T)

# Readme: note 3 - working directories

setwd('/Users/Stone/Desktop/RforBiol/GSE56899_Reduced/')
setwd('/Users/Stone/Desktop/RforBiol/GSE56899_RAW')

# dir() lists all the files in the working directory, this is the input for the 
# read.celfiles() command
celfiles <- read.celfiles(dir())

# Readme: note 4 - classes and objects
class(celfiles)

# How many rows of data are these raw datafiles?
nrow(exprs(celfiles))

# We can boxplot these data, but the command will take a long time, so I have deactivated it
# boxplot(dat)

# Readme: note 5 - probes, probesets and genes
dat <- rma(celfiles)
dat <- exprs(dat)
# The data is now normalized and summarized
# Technical replicates on the array are now averaged to a single probeset value

# Now to inspect the data
boxplot(dat)

# I can cluster the data by array, and plot it
# I first need to find the "distances" between the arrays
# and show those distances in the hierarchical cluster plot
# I can pile up all the commands in one
plot(hclust(dist(t(dat))))

# Write a pdf version as a more permanent version
setwd('/Users/Stone/Desktop/RforBiol/')
pdf("dData Clusterplot.pdf")
plot(hclust(dist(t(dat))))
dev.off()

# Finally I have Principal Component Analysis which is a very powerful 
# and widely-used technique for viewing patterns of gross variation
# in datasets
# We can see whether an array is substantially different to the others
plot(princomp(dat)$loadings)
outliers <- identify(princomp(dat)$loadings)

if (length(outliers) > 0) {
  cat("The outliers are: ", colnames(dat)[outliers], sep="\n")
} else {
  cat ("No outliers were selected")
}  
  
# Readme: note 6 - regular expressions
# Phenotypic information is contained 

nonpreg <- grep("Non_Preg", colnames(dat))
preg <- (1:ncol(dat))[-nonpreg]

preglabel <- rep("P", ncol(dat))
preglabel[nonpreg] <- "N"
plot(hclust(dist(t(dat))), labels=preglabel)

preg.number <- gsub(".*P(\\d+)_.*", "\\1", colnames(dat[,preg]))
nonpreg.number <- gsub(".*Non_Preg_(\\d+).*", "\\1", colnames(dat[,nonpreg]))

trimester <- gsub(".*_T(\\d+).*", "\\1", colnames(dat[,preg]))

# Readme: note 7 - coercion
trimester <- as.numeric(trimester)

# PCA plot of only the pregnant samples, by trimester
plot(princomp(dat[,preg])$loadings, col=trimester, pch=20, cex=2)

# Readme: note 8 - factors
pstatus <- rep("FALSE", times=ncol(dat))
pstatus[preg] <- "TRUE"
pstatus <- factor(pstatus)

plot(princomp(dat)$loadings, pch=20, cex=2, col=pstatus)

###############################
#        4 Ways to do exactly the same thing
#        l33297 row-by-row t.tests
#        in increasing orders of sophistication
###############################

# Method 1 - NO!
t.test(dat[1,preg], dat[1, nonpreg])$p.value
t.test(dat[2,preg], dat[2, nonpreg])$p.value
# etc etc
# this is madness

# Method 2 use a loop
pvals <- rep(0, nrow(dat))
for (i in 1:nrow(dat)) {
  pvals[i] <- t.test(dat[i, preg], dat[i, nonpreg])$p.value
}

# Method 3 the apply function

  # First to introduce the apply function
  # Here is apply using an off-the-shelf function, mean()
  # We calculate the means of everyrow

  apply(dat, 1, mean)

  # Every column mean
  apply(dat, 2, mean)
  plot(apply(dat, 2, mean))

# Now the p-value calculation using apply
# Although the t.test() function is off-the-shelf
# We want to extract the p-value, so we need to write our own function

pvals <- apply(dat, 1, function(x) { t.test(dat[x,preg], dat[x,nonpreg])$p.value }  ) 

# Method 4 the package way
t.preg <- rowttests(dat, pstatus)

# Let's take a look at the top of this
head(t.preg)

# Readme: note 9 - Multiple-testing adjustment
adj.p <- p.adjust(t.preg$p.value, method="BH")
t.preg <- cbind(t.preg, adj.p)

# We can have a look at our p-values as a histogram
hist(t.preg$adj.p)

# Or get a summary, summary() is a very useful "first look" command
summary(t.preg$adj.p)

# How many genes have an adjusted p-value of less that 5%?
sum(t.preg$adj.p < 0.05)

# What rows (probesets) are significant?
sig.preg <- which(t.preg$adj.p < 0.05)
sig.preg.dat <- dat[sig.preg, ]

# How about a lovely heatmap of the data
heatmap(sig.preg.dat)

# What are the probeset id's of the significant genes?
sig.preg.probes <- rownames(dat)[sig.preg]

# Let's write these to a text file
write.table(sig.preg.probes, '/Users/Stone/Desktop/RforBiol/SigPregProbest', 
            quote=F, row.names=F, col.names=F)

preg.dat <- dat[,preg]

# I perform a 3-group analysis (F-test) on the trimester data
# I'm using some shortcuts, I'm not bothering to make a separate factor for trimester
t.trim <- rowFtests(preg.dat, as.factor(trimester))

# Another short-cut, I'm doing the multiple correction and sending it straight to the 
# summary() command, so that I can immediately see whether there is anything signifacnt 
# or not
summary(p.adjust(t.trim$p.value, method="BH"))
# The lowest adjusted p-value is 0.9304

#######  Complicated stuff

# Using the apply function to remove a co-variate

# Let's make a pretend variable
smoking <- sample(x=c(T, F), ncol(dat), replace=T, prob = c(0.25, 0.75))
drinking <- sample(x=c(T, F), ncol(dat), replace=T, prob = c(0.6, 0.4))
obese <- sample(x=c(T, F), ncol(dat), replace=T, prob = c(0.3, 0.7))


#no.smoke <- apply(dat, 1, function(x) { lm(x ~ smoking )$resid})
#no.drink <- apply(dat, 1, function(x) { lm(x ~ drinking )$resid})
#no.anything <- apply(dat, 1, function(x) { lm(x ~ smoking + drinking + obese)$resid})


#############
#
# This is the "fancy" way for serious microarray people
# Using the limma package
# I am not going to describe it in any detail
# But you fit a linear model to each gene
#

design <- model.matrix(~ 0 + pstatus )
colnames(design) <- c("preg", "nonpreg")
fit <- lmFit(dat, design)
fit <- eBayes(fit)

contrasts <- makeContrasts(preg - nonpreg, levels=design)
fit2 <- contrasts.fit(fit, contrasts)
fit2 <- eBayes(fit2)

preg.genes <- topTable(fit2, n=Inf)
sum(preg.genes$adj.P.Val < 0.05)


Exercises for Training Day

Purpose of the Day

  • It is structured to encourage you to work through four exercises during which you will learn various skills in R.
  • The Exercises illustrate and explore different skills necessary for data analysis.
  • The primary objective of the day is to help you develop the skills to use R to analyse your own data.

Structure of the Day

Over the course of the day, it is hoped that you will complete one example from each of the four exercises:
  • Exercise I – Scripts containing data to plot and analyse.
  • Exercise II – Data wrangling before and within R
  • Exercise III – Scripts that imports data, does some manipulations and calculations and generates some visualisations.
  • Exercise IV – Developing a workflow for your own data
You may start at any point. For beginners, I would recommend exploring one of the scripts in Exercise I.

One script in each exercise will be explored during the day.

To execute and explore the script:
  1. Cut and paste the script into the script window of R-Studio.
  2. Run the script line by line and watch how the environment changes
  3. Investigate the objects that have been created.
  4. Play with the script to determine how the different functions affect the outcome of the graph.
  5. Running parts of the layers that generate the graph is very useful.
Each Exercise is illustrated by multiple examples. You can choose any of the examples and work through more than one if that’s helpful. 

Here is the information for each Exercise.

Exercise I

  1. Drawing a protein assay and calculating unknowns
  2. Drawing an enzyme kinetic plot
  3. Drawing a cell death curve

Exercise II

  1. Wrangling in Excel
  2. Wrangling with R a little
  3. Using reshape package to draw six enzymology graphs with ggplot 

Exercise III

  1. Get your data into R
  2. Play with your data - visualise it!
  3. Try some of the things from scripts above and apply to your own data
  4. Search the web for your kind of data
  5. Chat with the tutors and get some advice.


Please don't go home without trying all four exercise including having a plan for your own data.  

Data wrangling in Excel

I do some of my data wrangling Excel because this allows me to cut and paste and get my data into a format that I understand. 

To illustrate this process, I will show a starting Excel file and a much better example. 

The before file is one that we published last year (Proteomics-Based Strategies To Identify Proteins Relevant to Chronic Lymphocytic Leukemia (Alsagaby et al, J. Proteome Res., 2014, 13 (11), pp 5051–5062).  Please download and open our  list of 728 proteins which is available from the JPR website as an Excel file.

Here is a photo of the file:


To use this in R:

  • Delete everything you don't want.
  • Get the titles into one line
  • Shorten the titles to something useful
  • Save as a csv file (comma separated values)
  • Try the read.csv() function to get it into R. 
Here is a nicer look file:


There is a way to clean up your data in R too. I used the readxl package. 
For an example see this script:

Tuesday 23 June 2015

The chemical logic of glycolysis

Dr Sergio Martínez Cuesta from the EMBL-EBI has prepared the script below which he will demonstrate and discuss during our Training Day tomorrow. 

The script analyses the functional differences between glycolytic enzymes using principal component analysis (PCA) and hierarchical clustering. It generates some very nice heat maps. 

Here's one of the plots, produced with the pheatmap package


Analysing enzymes in terms of bond cleavage


SCRIPT
### Title: The chemical logic of glycolysis
### Author: Sergio Martínez Cuesta, EMBL-EBI, Hinxton, UK
### Aim: To visualise chemical similarities between enzymes reactions in glycolysis using latent variable models (PCA and CA) and clustering techniques

## Data input: load bond change data into R
data <- read.csv("http://science2therapy.com/data/bc.csv", header=TRUE, row.names=1, sep="\t", check.names=FALSE)

# bc.csv contains the frequency counts of chemical bond changes of the 10 glycolytic reactions as obtained from EC-BLAST
# header=TRUE and row.names=1 allow the first row and column to be considered the column and row names, sep="\t" indicates that bc.csv is tab-separated and check.names=FALSE disables the check of variable names


## Explore data
data
class(data)
dim(data)
colnames(data) # types of bond changes (formed and cleaved)
rownames(data) # enzyme ids, see data/glycolysis_enzymes.csv


## Barplots
# Which glycolytic enzyme catalyses more bond changes?
freqs_bc<-sort(rowSums(data), decreasing=TRUE)
freqs_bc
barplot(freqs_bc, col="white", ylab="Frequency of bond changes", xlab="Enzyme name")


# Which bond changes are more common in glycolysis?
freqs_enz<-sort(colSums(data), decreasing=TRUE)
freqs_enz
barplot(freqs_enz, col="white", ylab="Frequency of bond changes", xlab="Type of bond change")


# Average number of bond changes by glycolytic reaction
mean(rowSums(data))


## Principal component analysis (PCA)
fit <- princomp(data)
summary(fit)
biplot(fit, main="PCA")
loadings(fit)
fit$scores


# Additional packages: FactoMineR
install.packages("FactoMineR") # this only needs to be done once
library(FactoMineR)
fit <- PCA(data, scale.unit = FALSE)


## Correspondence analysis (CA)
install.packages("ca")  # this only needs to be done once
library(ca)
fit <- ca(data)
summary(fit)
plot(fit)

# using library(FactoMineR)
# fit<-CA(data)


## Calculate bond change distances between glycolytic reactions
?dist
d <- dist(data, method = "manhattan")


## Hierarchical clustering
fit <- hclust(d, method="ward")
plot(fit, main="Hierarchical clustering")
groups <- cutree(fit, k=4)
rect.hclust(fit, k=4, border="red") 


## Heatmaps
heatmap(as.matrix(data))


heatmap(as.matrix(d))


## Pretty heatmaps
install.packages("pheatmap")  # this only needs to be done once
library(pheatmap)
pheatmap(data, 
         fontsize=13, 
         cellwidth = 15, 
         cellheight = 15, 
         color = colorRampPalette(c("white", "red"))(4),
         clustering_distance_rows=d,
         legend_breaks=c(0,1,2,3))


## How to save pdf images:
pdf("mygraph.pdf")
pheatmap(data)
dev.off()


# References:
# 1- Quick-R: http://www.statmethods.net/

# 2- Crawley, M. J. (2007). The R Book. Chichester, UK: John Wiley & Sons, Ltd. doi:10.1002/9780470515075

# 3- Rahman, S. A., Martínez Cuesta, S., Furnham, N., Holliday, G. L., & Thornton, J. M. (2014). EC-BLAST: a tool to automatically search and compare enzyme reactions. Nature methods, 11(2), 171–174. doi:10.1038/nmeth.2803. url: http://www.ebi.ac.uk/thornton-srv/software/rbl/

# 4- Husson, F., Lê, S., and Pagès, J. (2011) Exploratory multivariate analysis by example using R, [online] http://books.google.com/books?hl=en&lr=&id=EDnNBQAAQBAJ&oi=fnd&pg=PP1&dq=Exploratory+Multivariate+Analysis+by+Example+Using+R&ots=I4bnnmgPJw&sig=ENW39pnO00fOOSO_F01cQ_Iv-UA (Accessed February 6, 2015).

# 5- Keller, M. A., Turchyn, A. V., & Ralser, M. (2014). Non-enzymatic glycolysis and pentose phosphate pathway-like reactions in a plausible Archean ocean. Molecular systems biology, 10, 725. Retrieved from http://www.ncbi.nlm.nih.gov/pubmed/24771084